
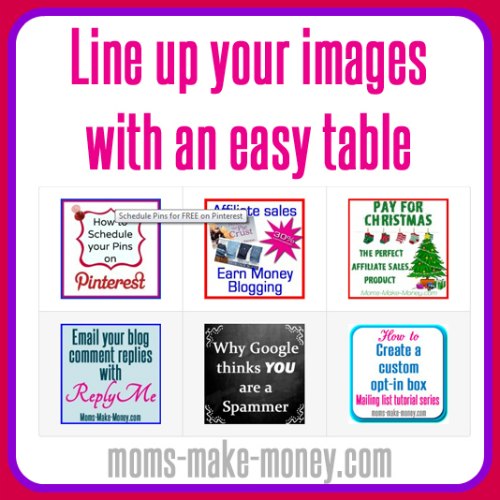
Line up images with an easy html table
If you’ve ever tried to line up images in your posts on any of the blogging platforms you just might have found out that this is a sure way to drive yourself crazy! Why won’t they stop where you want them to? Why are they all different sizes, and end up in zig-zags and randomness instead of nice neat straight rows. Arrggh.
Frustration over – its easy when you know how. You need to put them in an easy html table. And you can write one in html with just 3 simple commands – start and end table, start and end table row and table data. Let me show you how and we’ll look at making a nice neat Linky Party page or clickable project page to showcase your best posts.
Here are the html commands that you need to make the table.
<table> – start of table
<tr> – start of new table row
<td></td> – table data holders
</tr> – end of table row
</table> – end of table
These posts are lined up here using an easy html table with two rows. All are clickable links that will take you to other pages. You could also use this method to create a linky party page, a clickable projects gallery, a popular posts sidebar widget or simply a photo gallery of your work.
 |
 |
 |
 |
 |
 |
Thank you to Kimi for submitting this readers question and prompting me to show you how to make an easy html table. If you have any burning questions that might be suitable for a feature on the site, do leave a comment and I’ll do my best to write a post, tutorial or make a video to help out – all assuming I know how to do it of course!
And why not post a link below to your new link party page, or project page so we can all admire the new table you made and how you lined up your images beautifully.
Authored by: Deby at Moms Make Money


January 17, 2014 @ 10:45 am
I really need this! Thanks so much! I have been wanting to do this in my sidebar with popular posts and on my linky party page like you mentioned. Pinned :)!
January 17, 2014 @ 12:47 pm
Pinning! Found your link at the Pin Me party!
January 17, 2014 @ 3:02 pm
I’ve been looking for exactly this! Thanks so much!
January 17, 2014 @ 3:40 pm
Thanks for sharing. Very useful.
January 17, 2014 @ 4:18 pm
Also pinned. Brilliant tip. Trying to do this on my blog, mumtopia, has been driving me nuts. Thank you!
January 17, 2014 @ 11:44 pm
Here is where I used your tip! Thanks again! http://swoodsonsays.com/diyidid/
January 18, 2014 @ 8:01 am
Looks marvelous! There is just one open tag showing up on the page under the top of the stuff I sewed section that looks like it is out of place, otherwise the page looks just perfect! Great job.
January 18, 2014 @ 10:13 am
Hi! Found you over at Shaken Together. Your instructions were very easy to follow. I created a table on my blogger using some pics. I’ve always wanted to be able to enter pics into a table to save some space instead of running over to pic monkey all the time. Question: What is the command to center the table on the page?
January 18, 2014 @ 11:12 am
To center your table you would just use the regular html center code: Open tag bracket, then the word center and a closed tag bracket. Then put all of your table code here. Then a closing center tag. Its hard to type it here because it interprets it as html and tries to center my reply! But basically put the whole table code between center tags. I’ll add it into the post itself. Do leave us a link to your completed page so we can see how it worked out.
January 25, 2014 @ 12:05 pm
Thank-you Deby.
January 18, 2014 @ 6:59 pm
I have been wanting to do this forever! I just installed a WP plugin for a gallery on my pages with post linked tiles. I like your way better, since it is timeless. Even if the plugin gets old and un-usable, I still can do this now that you provided the html. You are amazing to share your knowledge! How I would love to pick your brain about a few other things.. 🙂
Blessings,
Kim
January 19, 2014 @ 7:04 am
I know what you mean about the plugin Kim. My sewing site uses a plugin to set up a photo gallery for some of my roundup posts and now I wish I had set them up as a table – better for SEO as well. But its such a lot of work to go back and redo all of those hundreds and hundreds of links now 🙁
January 19, 2014 @ 8:28 am
This is GREAT! Saw on the titi and crafty link party!
January 19, 2014 @ 10:00 am
This is brilliant, thanks so much. Something I will definitely be using. Well explained 🙂
Over from the Sew darn crafty link up.
Kate
January 19, 2014 @ 10:57 am
Great to hear Kate. Drop back and leave a link if you set up a new page, gallery etc so we can all admire your work.
January 19, 2014 @ 11:06 pm
Thank you for posting this! My fiance did that for me once but hasn’t showed me how yet. It’s nice to have these steps here.
January 20, 2014 @ 7:41 am
This is so helpful! Having all the links displaying neatly really makes a difference. Thank you so much for sharing this!
January 20, 2014 @ 11:59 am
One of those things that I’ve totally been in need of. Thanks a million, Deby! Enjoy your day!
January 20, 2014 @ 12:13 pm
So glad it is useful Brooke. Enjoy yours too.
January 20, 2014 @ 12:38 pm
Thank you!! This is exactly what I needed. I am making 3 landing pages on my blog and they have been such a mess.
January 20, 2014 @ 2:07 pm
Hi Cinday – it’s easy when you know how! You’ll be looking for places to use this now.
January 20, 2014 @ 9:22 pm
Wow this is a great idea! I have been looking for how to do this! So glad I found it here, I enjoy your blog and have pinned several things including this 🙂
January 20, 2014 @ 10:16 pm
Oh wow! This is great! I have been searching for something just like this!
Thanks so much for sharing on Turn It Up Tuesday! I have just learned something! 🙂
January 21, 2014 @ 8:38 am
Thanks for sharing this!!
January 21, 2014 @ 10:51 pm
Deby – Thanks for sharing this info – I have been wondering how to do this. I bought a really good html & css book right before the holidays but have not had time to read it or try the things out in it yet. Too much to do.
January 22, 2014 @ 10:21 am
Love this, thanks! one thing.. when i click visual to see how it looks, my photo is smaller than the box made by my html. It’s just sitting inside the dotted line that indicates my sections. does that make sense? then when I preview it, my photos are pretty small. I can’t figure out why my photo isn’t filling the whole box.
any thoughts??
January 22, 2014 @ 2:12 pm
If you need to, you can change the size of the photo using the width command. So inside the brackets where the image code is leave a space then type width=”***” whatever number you want. All themes are different in the way they handle tables so perhaps yours is doing something unexpected. If you had selected a thumbnail at 150 wide for example, perhaps your table is filling the whole width of the available space and you need a larger thumbnail to fill the box. Try 200 wide and see what that looks like. Or add in another box to your table to make more boxes per row. You may need to experiment to get the best fit.
January 22, 2014 @ 9:43 pm
Thanks for the info–pinned!
January 23, 2014 @ 10:57 am
Thank you so much for sharing!!! I really needed this as it drives me nuts when they don’t line up and I was looking the other day for a table option and couldn’t find it, now I know how to make it myself.
Thanks.
January 23, 2014 @ 1:28 pm
Thank you so much for posting this. The buttons all over my page has been making me crazy!! My OCD thanks you,
Kelly
January 23, 2014 @ 5:41 pm
Very helpful!
February 7, 2014 @ 2:05 pm
Thank you so much! This has been on my To Do list forever, since the boxes/badges at the bottom of my Work With Me page were such a mess.
March 10, 2014 @ 10:03 am
I tried this – really easy to follow, but I still can’t get my images to line up. Not sure what I’m doing wrong. I’m trying to arrange some ad links in my right sidebar, but they look wonkey no matter what I do to them.
March 10, 2014 @ 10:41 am
Are you making them all the same size Krystyna? Are you trying to line up just images or when you say ad links, are you trying to use scripts or code as well? Perhaps your sidebar isn’t wide enough for the images or maybe even your site’s underlying template could be making unintended changes.
March 10, 2014 @ 11:05 am
I made them all the same size in the html code, but they may have been slightly different sizes originally – would that make a difference? The sidebar might be part of the problem – I’ll have to figure out how to check on that & report back to see if it fixed my problem. I love your site by the way – you are so helpful to someone like me who is still learning.
March 10, 2014 @ 11:12 am
Oh & to add, when I added the links, I did it exactly as you showed in the video. I wouldn’t know how to add scripts intentionally.
April 10, 2014 @ 10:05 am
I’m thrilled to find this post. I’ve been wondering for some time how to show buttons in a row in a post. Thank you for making this so easy for non-technical people like me! 🙂
September 11, 2014 @ 1:38 am
Thats awesome and quite easy to do… thanks a lot
July 23, 2015 @ 8:13 am
Liked this simple and easy tutorial.
December 3, 2015 @ 3:10 pm
Thank you very much! This is great tutorial. You helped me so much! Thank you again 🙂 Vendula